Category Archives: Lutradur

Lutradur flower sample

Found time to nip down my studio and play with the soldering iron and some coloured Lutradur. The colours available to purchase in light weight Lutradur are at first quite bright as they are Red, orange, yellow, brown, green , blue and black But with a little attention paid to what works with what, you can achieve bright pieces especially if soldered on to black backing fabric

Lutradur picture

Just mounted this piece of painted, stamped, stitched and heat stressed piece of Lutradur ready to get framed. I really like this technique as you can do the same over and over again and get a different result every time. Considering I used red and bright yellow Lutradur layered on top of the piece which burnt back when I heat stressed it . I love the colour it turned out and that it is finished at this point. I did look at it and think maybe I needed to add beads or hand stitching but decided not to .

Lutradur play day

I have just spent a very pleasent day with eight ladies who wanted to know what Lutradur was all about.

We looked at what paints could be applied to it and then heat stressed some of them to give a lovley lacey effect. We used a soldering iron to solder out motifs from the lutradur and also to bond pieces together. We looked at sewing grids on first and then heat stressing it along with building up a collarged picture. The ladies really relaxed into it and were very open minded about the product.


Lutradur Fiddle Time

I have known I was teaching a workshop on Lutradur possibilities for months.

So why oh why did I leave my samples and experiments right to the last minute.

Oh that’ll be because I’m a busy teacher with her fingers in to many pies!

Never mind I have plenty to keep the ladies busy tomorrow and plenty of ideas to chuck out to them for experimenting. I’m quite looking forward to a messy day. Look out ladies here I come!

Ally Pally

The first day of The Knitting and Stitching Show opened today and was packed all day. There seemed to be more people than last year or is it that I’m another year older and it just appears like that.

Quite a odd set up this year as I am directly across the aisle from Margaret Beal of Burning Issues and I think we were both a little uneasy as to how we would do trading so close to each other. Good news is that it doesn’t appear to be an issue and we both did well for our first day even if between us we managed to bung up the isle with interested customers.

Journey into the show from our hotel is terrible but thankfully it’s only once a year.

Tomorrow I want to go in early so I can look at all the yummy exhibitions and find out what’s new this year.

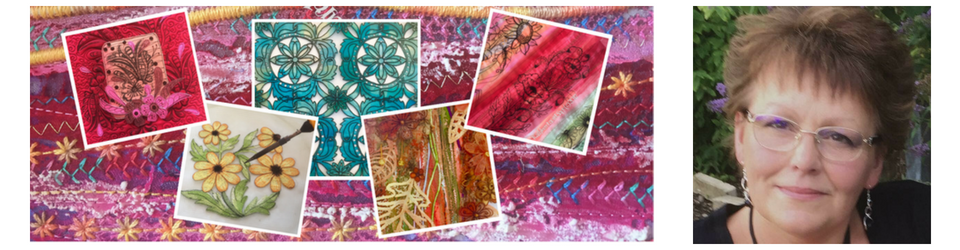
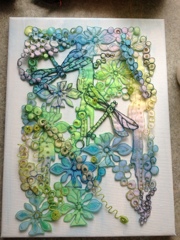
My new kits for the show are going down well with my little boxes and fan kits walking out fast. Dragonfly canvas is yet to get going and may need a push tomorrow . It’s a LOVELY kit.

Lutradur

I am running a class at Tudor Rose Patchwork shop soon on Lutradur and how to use if and what can be done to it to aid textile work. I have spent a really pleasant day experimenting with it. I like the way you can use it to create the most wonderful raised texture by applying a heat gun to its surface and making it lacy or you can cut it out using my “Best Friend”, the soldering iron. That’s without printing on to it with stamps or putting it through an inkjet printer and the million and one other things that can be done to it. Shame I don’t have the luxury of playing with it a little longer as I was just getting into it.

Never mind I will have to come back to it when I break for the Xmas holidays.

Lutradur Panels

Well I’ve had a lovely day playing with the Lutradur that Kim gave me and I’m pleased with the results. I used a plain piece of paper as i didn’t think they would turn out as well as they did and adhered the Lutradur directly on to it using my trusty old soldering iron friend to make designs in to it. I then peeled off any Lutrador not required leaving what i did want adhered to the surface. I over laid flowers and leaves on top of this and made marks in to them to adhere them also. They were then further decorated with machine stitchery and this afternoon i spent a pleasant couple of hours hand sewing in to them and adding beads and sequins along with pre  made organza leaves and flowers from my organza workshop scrap box